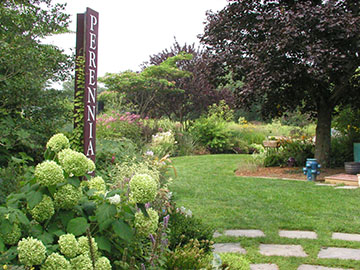
Spring 2021 Newsletter
| An Explosion of Annuals | Demystifying Dividing |
| Spring Pruning | Spring Cleanup & Mulching |
An Explosion of annuals
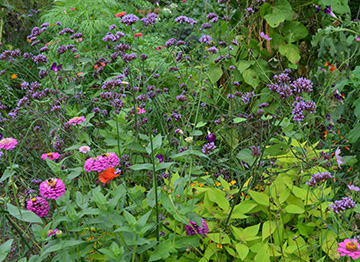
If you ever visit Tranquil Lake Nursery in late summer, you can’t help notice the many zinnias, cosmos, cleome, four o’clocks, salvia and climbing annuals that fill the borders around the vegetable garden, chicken coop and purple garden. While Warren prefers the carefully designed borders of perennials, trees and shrubs that grace the rest of the nursery, these brilliantly colored beds of annuals are all my doing. I love annuals! I plant them everywhere I garden. Then in late summer, I watch the hummingbirds, gold finches, butterflies, hummingbird moths and many other pollinators flock to these floriferous bloomers. They support birds and pollinators right through to frost. Zinnias are my favorites, but I truly love any brightly colored annual. They also offer the opportunity to bring armfuls of flowers into the house or to take them to friends.
While I buy a few annual plants in 4 inch pots or six packs, and overwinter others in the greenhouse, mostly I sow the seeds directly into the soil. And now is the time to sow these seeds. The soil has warmed up, and hopefully we are past our last spring frost, although have had a rare frost at the nursery as late as May 30. There are many annual seeds, that can be direct-seeded outdoors, right in the garden where you want them to grow. The following annuals seeds are ideal for direct seeding: sunflowers, calendula, marigolds, cosmos, bachelor button, love-in-the-mist, nasturtium, cleome, sweet pea, annual poppy, sweet alyssum, larkspur, Ammi majus, castor beans, four o'clocks and of course loads of zinnias in every shape, height and color.
I also seed annual vines this time of year. My three favorite vines are scarlet runner beans, purple hyacinth beans and cardinal creeper. I plant them on trellises and on the chicken coop, and I put up posts around the garden to hold the vines. I plant all three seeds together on the same post or fence. The scarlet runner beans bloom first in July, then the cardinal creepers, with their finely cut foliage and small tubular red flowers, start blooming. Finally, the purple hyacinth beans blossom with long wands of purple flowers in August and September. This gives the hummingbirds three months of flowers to sip. The baby hummingbirds can always be found in the vegetable garden in late summer. Other vines that can be directly sowed are: morning glory, chalice vine, mina lobata, love-in-a-puff and thunbergia. I save my own seeds of these vines in the fall, so I will have plenty to plant next year.
I find that many of the annuals reseed in the garden every year, giving me a head start on the season. I find sunflower, zinnia, cosmo, cleome, marigold, calendula, love-in-the-mist, annual poppy, bachelor button and tons of Verbena bonariensis seedlings throughout the garden. Learn to recognize these young seedlings, and you won't accidentally weed them out. While, you may have to sacrifice some from areas where you want other plants, you can save quite a few. I also move some seedlings. Choose a cool morning, preferably after a rain. Water well and cover for a day or two so they can acclimate.
I always remove morning glory seeds, because they do not come true and can become quite weedy. However, the cardinal creeper, which is in the same family, also reseeds and it is truly wanted. It comes up very late, well into June. It looks like a blade of grass at first before the cotyledons separate, so I am careful to look for it where it grew the previous year. If you have a lot of reseeding annuals in one bed, such as love in the mist, calendula, bachelor buttons and poppies, you may want to declare it a no-till garden, and let these seedlings take hold.
Getting Started with Seeding Annuals: First prepare the soil, annuals like loose well-drained soil. Remove any weeds. Add 3 to 6 inches of compost and dig it into the soil. Then level the soil to get it ready for planting.
You can plant the whole beds with seeds, but I usually start by planting a few young annuals that I purchase or start indoors. This gives the bed a planted look, while you are waiting for the seedlings to take hold. The ideal time to plant potted seedlings is on a cloudy day, this protects the newly planted annuals from sun stress. You can also plant late in the day. Water the young seedlings well before you transplant. Arrange them in the garden, while still in their pots. Give them enough room to spread out, and also allow room for seeding between the plants, as well as in the front and back. Dig a shallow hole. Gently remove each seedling from its pot by squeezing the pot and flipping it over. Do not pull the seedlings out by the stems, as the stems will likely break. Plant the seedlings into the holes and firm the soil around them. Water well with a gentle spray from a watering can or watering wand with a gentle shower.
Then direct seed between the young seedlings. Space the seeds 6 to 8 inches apart. The seed packet should help with recommended depth and spacing. The rule of thumb is generally to plant the each seed twice its diameter. To plant very small seeds, like alyssum, take a pinch of seed and place it in your hands. Then sprinkle the tiny seeds over the soil, so they are lightly covered with soil. Once you seed an area, water it well. Continue watering daily for a few weeks. Most annual seeds will germinate in 6 to 8 days, if kept adequately moist. Once your seeds have germinated and are six inches high or so, they will benefit from fertilizing. I liquid feed annuals once a week during the summer months to give them a good start and encourage lots of flowers. The direct sowed seeds will flower at their usual bloom time or very soon afterward.
There are a few seeds that I soak in warm water for a few hours before planting. This helps them to imbibe water and break the hard seed coat. I always soak the scarlet runner beans and purple hyacinth beans. Castor beans, nasturtiums, Job’s tears and any other seed with a hard coat will benefit from soaking.
At the end of the season, collect seeds from your plants to sow the following year. Before the frost arrives and once the seed heads have ripened, snip off seed heads whole or tap the seed heads into a brown bag. Take the seeds inside and spread them out to dry. Remove any seeds from pods, so they will dry thoroughly. They put the dried seeds into labeled jars or envelopes to store for the following year.
 |
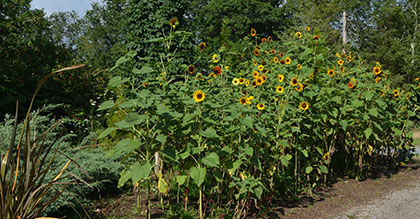 |
| Verbena bonariensis and zinnias | A mixture of sunflowers along the driveway |
 |
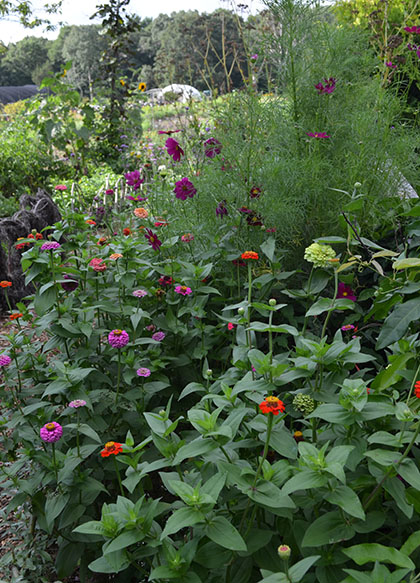 |
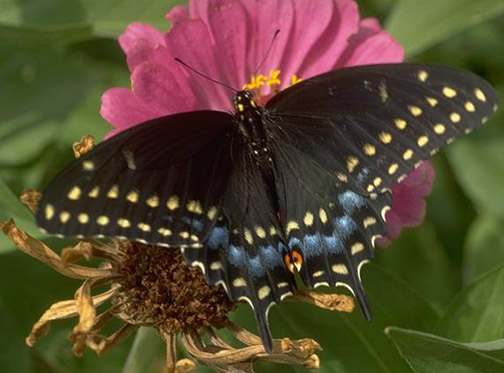
| Black Swallowtail Butterfly on a Zinnia | Zinnias, Cosmos, Sunflowers and More |
Demystifying Dividing
Division of perennials allows for the propagation and rejuvenation of overgrown plants. Even "low-maintenance" perennials, such as daylilies and Siberian iris, eventually need to be divided, though they can easily be left in the garden for five years or longer. Divide when you see a loss of vigor and bloom, development of a dead space in the center of the clump or when weeds and other plants invade the clump.
Digging your perennial borders, amending the soil, dividing perennials and replanting will reward you with vigorous plants that will produce an abundance of new growth and flowers. You do not need to be dexterous with chop sticks, possess a degree in physics or have the strength of Hercules to be successful! "Give me a lever long enough and I'll move the earth" is a boast credited to Archimedes, the mathematician who formulated the principles of the lever and fulcrum. For many gardeners, lifting, dividing and moving over-grown perennials may seem as daunting as moving the earth.
Tools of the trade needed for dividing perennials include a spading fork, shovel, spade, assorted knives and a tub or pail of water. Use a fork to dig plants from the soil, in order to sever as few fibrous roots as possible. The ideal is to raise the entire clump out of the ground. If a giant clump of daylilies or Siberian iris cannot be wrested from the ground whole, quarter it in place with a sharp spade, cutting through the center and between the foliage. The individual pieces can then be freed with a fork.
Daylilies, Siberian iris and hosta grow and expand by sending out side shoots from the crown. These side shoots can be gently teased apart by carefully shaking and pulling by hand. Dunk the clump in a tub of water to wash away excess soil, so that you can see more clearly and also separate inter-twined roots with minimal cutting.
The point of a sharp knife is useful for cutting through the basal crown to separate individual shoots that have their own root system. Care should be taken with fibrous-rooted plants, such as Siberian and Japanese iris and hosta, to prevent excessive drying or exposure to the roots. Wrap divisions in wet newspaper or peat moss until replanted.
It is best to divide perennials in the spring and fall. At Tranquil Lake Nursery, we dig Siberian iris from the time the top growth appears in the spring through late May, and then again in late August through October. Late summer and early fall weather conditions offer more predictable rainfall, moderate air temperatures and warm soil conditions that are ideal for establishing perennial divisions.
Although fibrous rooted, iris can only be dug in the spring and fall, daylilies have fleshy and fibrous roots that allow for division throughout the summer, even while in bloom. The foliage should be trimmed back to compensate for root injury or loss. Plant early enough to allow roots to establish and grow. Mulch well, so plants won't be heaved by frost in the winter.
Astilbe, goatsbeard and monkshood develop a woody basal crown with fibrous roots. Use a sharp knife to cut apart divisions. Coreopsis verticillata spreads by creeping roots and can easily be cut up into clumps. We are also dividing some perennials with long tap roots, while they are still cool. Replant with the root as straight as possible. These include: Eryngium planum (Sea holly), Crambe maritima (Sea Kale) Angelica gigas (Korean Angelica) Asclepias tuberosa (Butterfly weed) and more. Whether you want to increase your favorite plant, or your borders are filled with sluggish overgrown behemoths, dig in and divide.
Spring Cleanup & Mulching
It’s spring and we are all extremely anxious to get out into the garden and start planting, especially this year, with the whole household home and feeling claustrophobic. Yet, the soil is too cold for planting vegetable and flower seeds, and in some cases too wet to do as much as we want to do. Also, here in southeastern Massachusetts we can not be sure that the threat of frost is past until mid May. At Tranquil Lake Nursery, we are sited along a river and in a frost pocket. We have been known to get a late spring frost at the end of May.
It is a good time now to clean up the gardens, weed out any persistent perennial weeds that have overtaken the perennial borders and remove any young annual weed seedlings. Here at the nursery, we are also moving a few bulbs and transplanting others, and dividing some of the overgrown perennials. Once we weed each garden, we are applying a layer of compost to enrich the soil with a layer of mulch on top to suppress annual spring weeds. In the vegetable garden, we are adding loads of compost and digging over the beds, in preparation for mid-May planting. And it is the time of year to put out the hummingbird and oriole feeders, in anticipation of their late April/early May arrival. Here are some of our garden tips for this week.
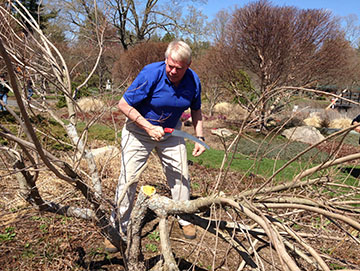
1. Prune - dead or broken branches from small trees and shrubs using a hand pruner or hand saw. Cut back to live stems. You can also gently shape summer blooming shrubs and trim overgrown evergreens. Using a pruning sheer, cut back to a branch that is growing in a direction that you want to encourage. On climbers, keep younger green canes and remove older woody canes. Fasten canes in place with twine or ties.
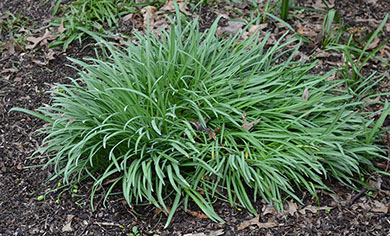
2. Cut back - flowering perennials to a height of four to five inches above the soil. Just remove the dead stems, you should already be seeing new shoots starting to grow on most perennials. Cut dead stems from ornamental grasses to 2–3 inches above the soil to allow new shoots to grow. Some shorter grasses, such as hakenochloa and fescue, should not be cut down. Gently run your fingers through the foliage to remove the browned dead foliage.
3. Clean up - the gardens by gently raking out fallen leaves and dead perennial foliage. Pull up any remnant dead annual plants from last year. We use the leaves to mulch shrub beds and compost the dead foliage and annuals. Push any heaved plants back into the ground and tamp them down to replant. Weed out any persistent perennial weeds or grasses that have come back from last year. Pull up the young annual weeds. We cover the newly weeded garden with a layer of compost to about 1/2 inch before we add mulch. This will enrich the soil and suppress annual spring weeds. In areas of the garden, where there were only annuals last year, we add several inches of compost and dig them into the soil in preparation for this years seeds or transplants.
4. Mulch - garden beds with an inch of shredded leaves, bark mulch or lighter mulch such as pine needles or buck wheat hulls. This will help suppress annual weeds, hold moisture in the soil and moderate soil temperature. As described above, we add a 1/2 inch layer of compost first to add additional nutrition. The com post is topped off with an inch of mulch. Be careful not to add too much mulch. It can become matted, preventing nutrients and water from reaching roots. If there is a thick layer of mulch remaining from last year, strip that off before you add new mulch.
Mulch trees and shrub plantings with chopped garden leaves, bark mulch or even wood chips. Do not pile the mulch more than 2 and a half to three inches around trees and shrubs, and keep it away from the bark. Mulch that is too deep can causes rot in the trunk and creates a home for insects that then attack the tree. Too much mulch also encourages the development of secondary roots. The tree can start to depend on these secondary roots, causing the primary, deeper roots to wither. This makes the tree vulnerable in a drought and can also cause the tree to lose its anchor.
5. Hummingbird and Oriole Feeders - The hummingbirds and orioles usually arrive at the nursery between the 3rd week of April and the end of the month. We have not seen any sign of them yet, but are prepared. The sugar water feeders for both are out around the garden. To make the water solutions, boil water and add granular sugar, stirring until it dissolves. Wait until it cools to fill the feeders. Store any extra sugar water in the refrigerator for up to a week. For the hummingbird solution, add 1 cup of sugar for each 4 cups of hot water. For the orioles, add one cup of sugar per six cups of hot water. We also put out suet feeders with fruit for the orioles. When the hummingbirds arrive they find the feeders readily and also go in the greenhouse to feed from the blossoms on fuchsia, flowering maples, salvias and firecracker plants (Cuphea). The orioles drink from the Oriole feeders, but seem to prefer the suet with fruits. They eat greedily from these suets for the first two weeks after they arrive.
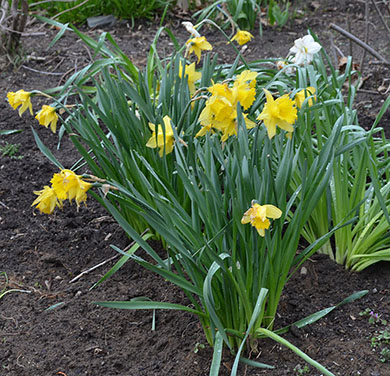
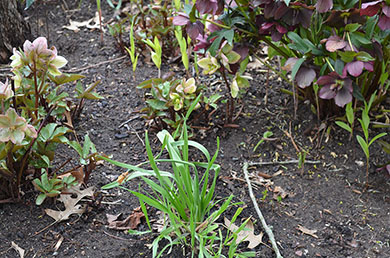
6. Move daffodils that need a new home - The ideal time to move or divide daffodils is when the foliage has collapsed and has turned mostly brown, usually in late spring. The bulbs will have stored up the energy they need to grow and bloom again next spring, but the leaves are still there to show the bulbs location. However, it is possible to move daffodils earlier in the season, when they are in bloom or shortly after. For example, we found several huge clumps of gorgeous trumpet and small flowered daffodils growing and blooming in the woods at the edge of one of our farm fields - probably planted there more than 30 years ago. We dug these clumps and moved them into a garden area. We used a shovel to dig into the ground several inches away from the bulb clump and work around it, taking care not to accidentally cut into the bulbs. We lifted the clumps and kept them together, carrying them in a wheelbarrow to their new home. We realize these daffodils will likely flop a bit and may turn brown prematurely. But chances are good that they will survive the experience and even bloom next spring. We also dug a few other daffodils out of the daylily fields. These daffodils were overgrown with few flowers. We divided them into smaller clumps and planted them in a garden. We added bone meal and lots of composts when we planted.
7. Divide and replant snowdrops - One of my favorite flowers, if not my absolute favorite, is the snowdrop (Galanthus nivalis). I even have a painting of snowdrops that I adore. Snowdrops are one of the earliest small bulbs to bloom in the spring and are just so cheerful, they also increase like crazy. There are two theories for when it is the best time to to dig and divide snowdrops. It is just easier for us to do it "in the green” just after flowering. Dig the clumps, gently remove as much soil as possible and then slowly but firmly pull sections apart. While, you will tear some roots, the bulbs survive. Gently tease the roots apart. This is best done on a cool day, out of the sun. Immediately replant the bulbs and water them well. The leaves will lie flat on the ground, but the young plant will be fine next year. Dividing one large clump will produce hundreds of cheerful snowdrops in next years garden.
8. Dig over your established vegetable garden beds to get them ready for planting in mid May. Add lots of compost to improve the soil. If you are preparing new beds try double digging to create an extra deep bed of loose soil – 16 to 18 inches, versus the 6 to 8 inches that most tillers create. First remove any existing vegetation from the area where the bed will be located. The maximum width of the bed should be 4 feet. That is the maximum width that will allow you to work the bed without getting into it and compacting the soil.
To Double Dig Your Garden Beds- Use a garden fork to dig a trench about one foot wide and 10 to 12 inches deep. Loosen and remove this soil, putting it onto a tarp or into a wheel barrow to use later. Then dig and gently loosen the soil in the trench as deeply as possible with the fork - rocking it back and forth gently down 10-12 inches. Do not mix or turn over this soil. Spread a couple inches of compost in the bottom of the trench and gently work it into the soil with a rocking motion. Next excavate a 12-inch wide strip of soil adjacent to the trench and use it to fill the trench. Avoid mixing the excavated soil. Loosen the soil at the bottom of the new trench and enrich it with compost just as you did in the previous step. Continue with this process until the entire bed has been worked through. Use the soil from the first trench, (on the tarp or in the wheelbarrow) to fill the trench that is left at the end of the bed. Spread a layer of compost over the completed bed and work it into the top layer of soil using the rocking back and forth technique. Then rake the bed into a smooth, even surface, ready for planting. Avoid walking on the bed.
Each spring, loosen the upper surface of the bed with a digging fork and enrich with the soil with fresh compost to replace the lost nutrients of the previous season. Depending on your soil type, you’ll need to double dig again every three to five years or so as the lower layers of the bed eventually become compacted again on their own. By loosening the soil very deeply (20-24”) and incorporating a lot of compost, the soil gets fluffed up and raised above its surroundings by a foot or more. This fluffy, loose, deep and friable soil now allows plant roots to grow straight down, rather than going down a few inches, hitting a hardpan, and turning sideways where they compete with each other for water and nutrients. Plants will use less water, compost and fertilizer than any other method of gardening and create a better yield. By the second year, the double-dug raised bed technique takes much less labor, because soil ecology is optimized and earthworms and other soil organisms do much of the work for you.
9. Clean up walkways and patios by raking gravel from garden beds. Add more gravel in depressions. Rake new sand or stone dust into joints between stones. Re-set any stones by removing them and adding new sand or stone dust. Remove slippery algae or stains with a power washer.
 |
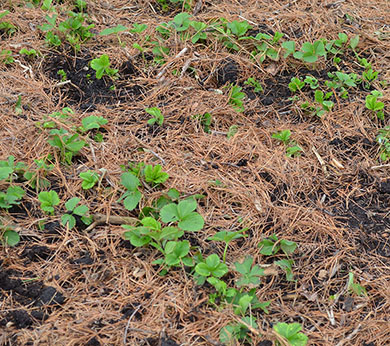 |
| Garden bed with fresh layer of Compost | Strawberries weeded, a layer of compost applied and then mulched with pine needles |
 |
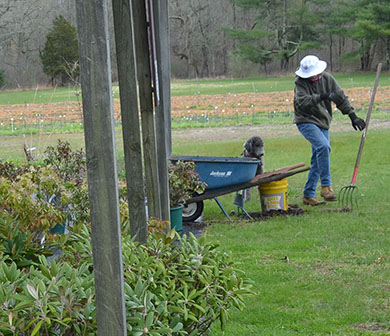 |
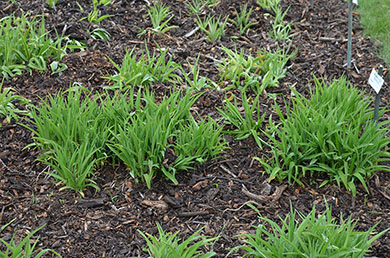
| Daylily bed weeded and Mulched with wood chips | Moving wood chips with wheel barrow and fork, supervised by Daphne. |
 |
 |
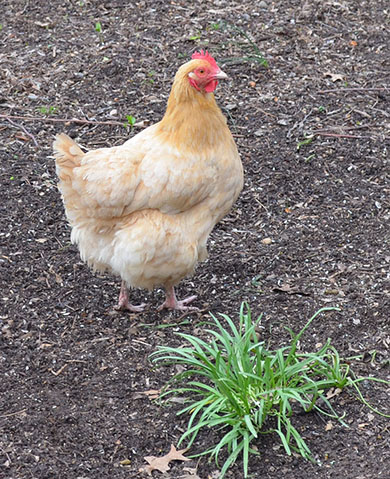
| Chickens scratch for bird seed among the snowdrops in early spring, since they are located under the birds feeders. They will be happier in a new location. | Snow drop (galanthus) clump that needs dividing |
 |
 |
| Daffodil Clumps moved from the woods a week ago, and replanted in the garden. | Jetfire Daffodil dug and divided from field and reset among the Hellebores at the first of April. |
 |
 |
| Hummingbird feeder in the foreground and Oriole feeder behind it on a crabapple tree. | Debi's Galanthus painting |
Spring Pruning
 |
Breaking leaf buds and emerging flowers are signatures of Spring’s awakening in the garden. They also signal to gardeners that it is time for spring pruning. There are even a few shrubs and trees that require spring pruning to promote masses of blooms in June or late summer. However, if flowers are what you desire, never spring prune a plant that blooms on last year's woody growth. Here are some things to do now:
1. Branches broken or damaged by winter storms should be pruned and removed as a matter of course.
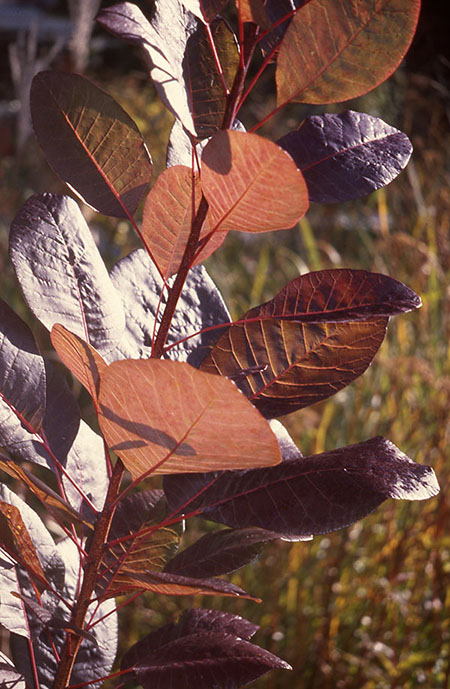
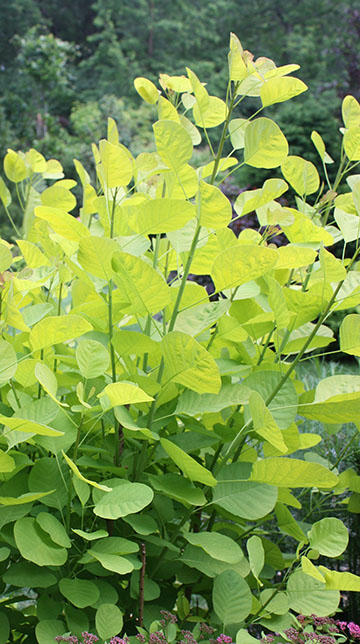
2. Some shrubs respond to severe pruning with vigorous growth and larger leaves. The purple smokebush (Cotinus coggygria 'Royal Purple'), or any smokebush cultivar, is a perfect plant to coppice, cut back to the ground. It will respond by producing exceptionally large leaves and robust and more colorful growth. You won’t get any smoke though, they bloom on old wood! Prune red twig dogwood in late winter or spring to produce shorter and more brightly colored foliage. Rejuvenate prune comptonia by cut them back to the ground.
3. Woody shrubs that have died back, can be cut back to the first viable bud. Clip back plants such as caryopteris, perovskia, Buddleia davidii and indigofera now to the first live bud.
4. The fall blooming bush clover, Lespedezia thunbergii, should also be cut back to the ground. It will grow to five to six feet and become a cascade of lavender flowers in September. Heptacodium miconioides (Seven Son Flower) is a small tree that blooms on new wood in September. Prune Heptacodium in April and May to reduce its size as well as promote new growth that will be covered with fragrant white flowers in the fall.
5. Prune shrubs that produce flower buds on new wood. Spring pruning promotes large displays of flowers in July and August. The smooth hydrangea, Hydrangea arborescens ‘Annabelle’ should be cut to the ground to promote new growth that will be topped with billowy clouds of white flowers mid summer. Hydrangea paniculata cultivars also bloom on new growth. They can be cut back by 2/3 to promote flowers. Calicarpa and Spiraea japonica also appreciate spring pruning. Blue hydrangeas, Hydrangea macrophylla, bloom on last years woody growth, which makes their flower buds prone to winter injury. If you spring prune a blue hydrangea, you will be removing this year's flower buds.
6. Remove the old and tired foliage from hellebores, epimedium and evergreen ferns now. New leaves will soon emerge, and the flowers on the hellebores and epimedium will show off better without the damaged foliage.
7. Cut back any grasses and perennials that you left in the garden for winter interest. 8. Lilacs should be pruned and dead headed immediately after they bloom. However, if you want to rejuvenate an overgrown lilac, forget the flowers and prune in early spring to promote new growth. Cut back 1/3 of the total plant. Lilacs will set flower buds in late summer to bloom the following May.
 |
 |
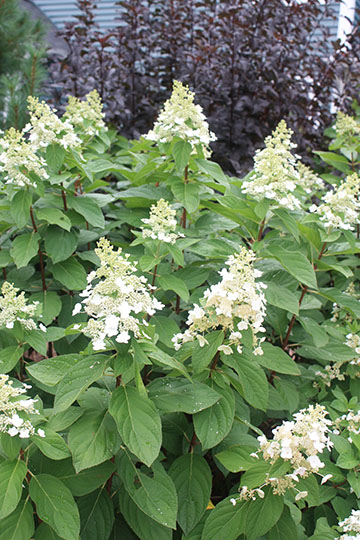
Hydrangea paniculata 'Tardiva' - cut back hard (1/2 to 2/3 the height) in spring. |
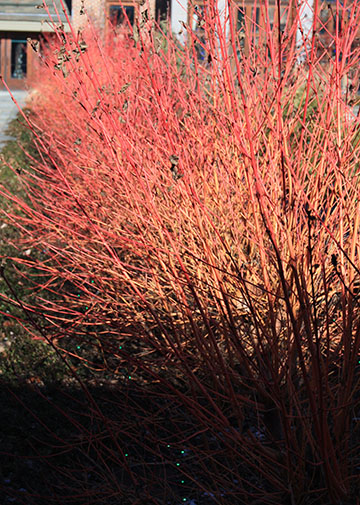
Cornus 'Midwinter Fire' - cut back 1/3 of plant to ground for colorful twigs the following winter. |
|
|
|
|
Caryopteris 'Longwood Blue' - cut back 1/3 in spring. |
Hydrangea arborescens 'Annabelle' - cut to the ground in spring. |
|
|
|
|
Prune seed heads off after flowering. To rejuvenate lilacs, forgo flowers and cut back 1/3 in early spring. |
Prune Indigofera ambylantha to six inches in early spring. |
|
|
|
|
Cotinus 'Grace' Coppice Smoke Bush to the ground in early spring for great foliage color, although no flowers. |
Cotinus 'Golden Spirit' can also be coppiced in spring. |
|
|
|
|
Heptacodium miconioides - prune in early spring to reduce size and promote September flowers. |
Lespedezia thunbergii - cut to the ground in spring for September bloom. |